Hexo搭建相关
Butterfly官方文档
安装文档二
安装文档三
安装文档四
美化特效
打字效果
网站背景
1 | # Website Background (設置網站背景) |
鼠标点击效果
页面美化
1 | beautify: |
网站副标题

页面加载动画

其他
分类页-设置子目录
1 | title: 二叉树的迭代遍历 |
评论
设置文章永久链接
1 | # URL |
在根目录下找到...\scaffolds\post.md,添加一个id属性
1 | title: 二维码扫描登录原理 |
推送文章链接给百度收录
根目录下安装依赖
1
npm install hexo-baidu-url-submit --save
配置
_config.yml1
2
3
4
5
6
7
8baidu_url_submit:
count: 100 # 提交最新的多少个链接
host: www.humg.top # 在百度站长平台中添加的域名
token: http://data.zz.baidu.com/urls?site=https://www.humg.top&token=**** # 秘钥
path: baidu_urls.txt
deploy:
- type: baidu_url_submitter执行
hexo g(会生成baidu_urls.txt文件),以后执行hexo d即可主动推送链接给百度收录响应信息
1
2
3
4
5
6
7
8
9
10
11
12INFO Deploying: baidu_url_submitter
INFO Submitting urls
https://www.humg.top/posts/20210507_p1.html
https://www.humg.top/posts/20210506_ckod0noc6000diuho9uxxgc2q.html
https://www.humg.top/posts/20210506_ckocvoh9h0001iuhoe6kvhywp.html
https://www.humg.top/posts/20210505_ckobh7a8h0008mrhobgvl5v3r.html
https://www.humg.top/posts/20210505_ckobftdi40006mgho60uqh256.html
https://www.humg.top/posts/20210505_ckob0qjnw000b5gho0qeba958.html
https://www.humg.top/posts/20210505_p1.html
https://www.humg.top/posts/20210502_ckob02m2s00005ghofeac7wxp.html
{"remain":2990,"success":8}
INFO Deploy done: baidu_url_submitter
使用WinSCP快速添加\编辑文章
进入博客文章目录
/appdata/Ablog/blog/source/_posts当前目录右键设置自定义命令

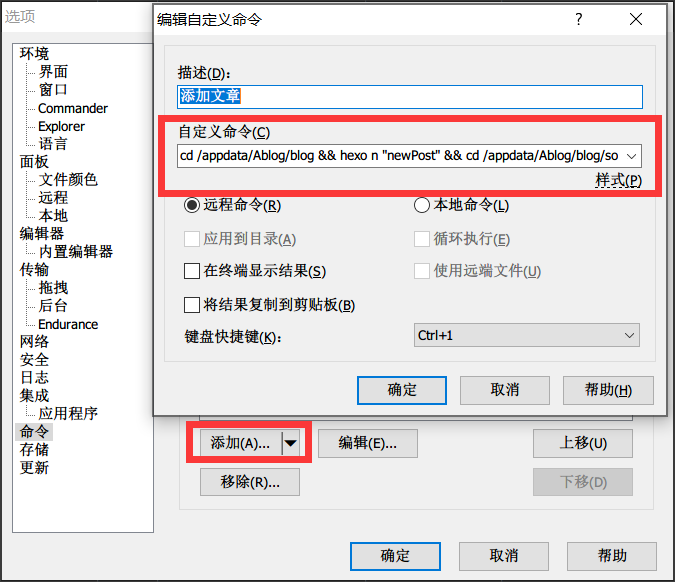
添加自定义命令
1
cd /appdata/Ablog/blog && hexo n "newPost" && cd /appdata/Ablog/blog/source/_posts
在WinSCP中打开文章(配合本地Markdown编辑器Typora)进行编辑,保存后hexo会自动把文章编译成静态文件。
已安装npm依赖
卸载依赖命令:
npm uninstall xxx
hexo-baidu-url-submit
本博客所有文章除特别声明外,均采用 CC BY-NC-SA 4.0 许可协议。转载请注明来自 HumgTop's Blog!
评论